Selecting the right concrete finish can impact safety, lifecycle performance, maintainability, and cost for any building, facility, or campus. For GCs, concrete subcontractors, and facilities managers, getting the means, methods, and timing right – especially finishing, jointing, and curing – determines whether a slab meets specifications like flatness/levelness, hardness, and appearance, while avoiding cracking, curl, dusting, and coating failures.
And understanding the various finish types, their maintenance, and repair needs allows facilities managers to effectively plan repairs, renovations, retooling, or any work that requires you to cut, core, or drill into your concrete.
You can use this quick-reference guide to help you determine the best finish for your job, plan for crew and equipment needs, set FF/FL expectations, schedule for saw cuts & cure times, validate slip resistance (DCOF) and moisture (ASTM F2170) requirements, and choose maintenance schedules that align with your facility’s use.
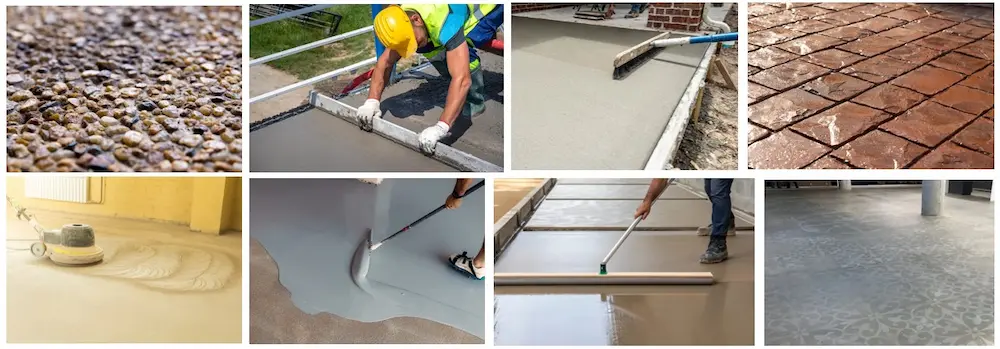
A. Cross Project Technical Fundamentals
1) Placing → Finishing Window (the “don’t miss it” timeline)
- It’s important to remember not to begin finishing while bleed water is present. The timing of finishing, jointing, and curing is critical; poor timing can cause cracking, scaling, impact the concrete’s wear resistance, cause dusting, and increase the risk of curling. When scheduling, you’ll want to plan manpower, tools, and breaks by both the size of the pour and the overall environmental conditions.
- Jointing: sawcut as early as the slab can support the saw without raveling. The typical guidance for jointing is within 4–12 hours, depending on temperature (hot sooner, cold later) and reach ≥ 1/4 slab thickness (≥ 1 in. minimum). Some specifications call 1/3 depth where fiber reinforced mixes are used. Joint layout and spacing should be established on your drawings. The specs are commonly 24-36 × slab thickness, but should always be driven by the engineer of record.
2) Curing (strength, abrasion resistance, color uniformity)
- Follow ACI 308R for optimal cure times. You’ll need to maintain moisture and temperature to ensure correct hydration. Seven days is a common minimum for many mixes. Although it may be longer for blended cements, pozzolans, or in colder weather. You may also use the manufacturer’s coverage rates and expected coating compatibility as part of your calculations. Not allowing adequate cure times can reduce surface strength and increases the risk for dusting and scaling.
- Moisture sensitive flooring/coatings: Your curing method must be compatible with subsequent finishes. For example, certain curing compounds may require removal prior to coating. It’s important to verify the specific curing and coating needs via submittals for each variety of concrete that may be used.
3) Acceptance Strength, Early Age Indicators
- Acceptance is 28 day unless otherwise specified (ACI 318). 7 day results are for monitoring only, not acceptance. Typical field heuristics see approximately 65-70% of 28 day strength by day 7, depending on mix and ambient temperature. You should always rely on project specifications for acceptance.
4) Floor Flatness & Levelness (F Numbers)
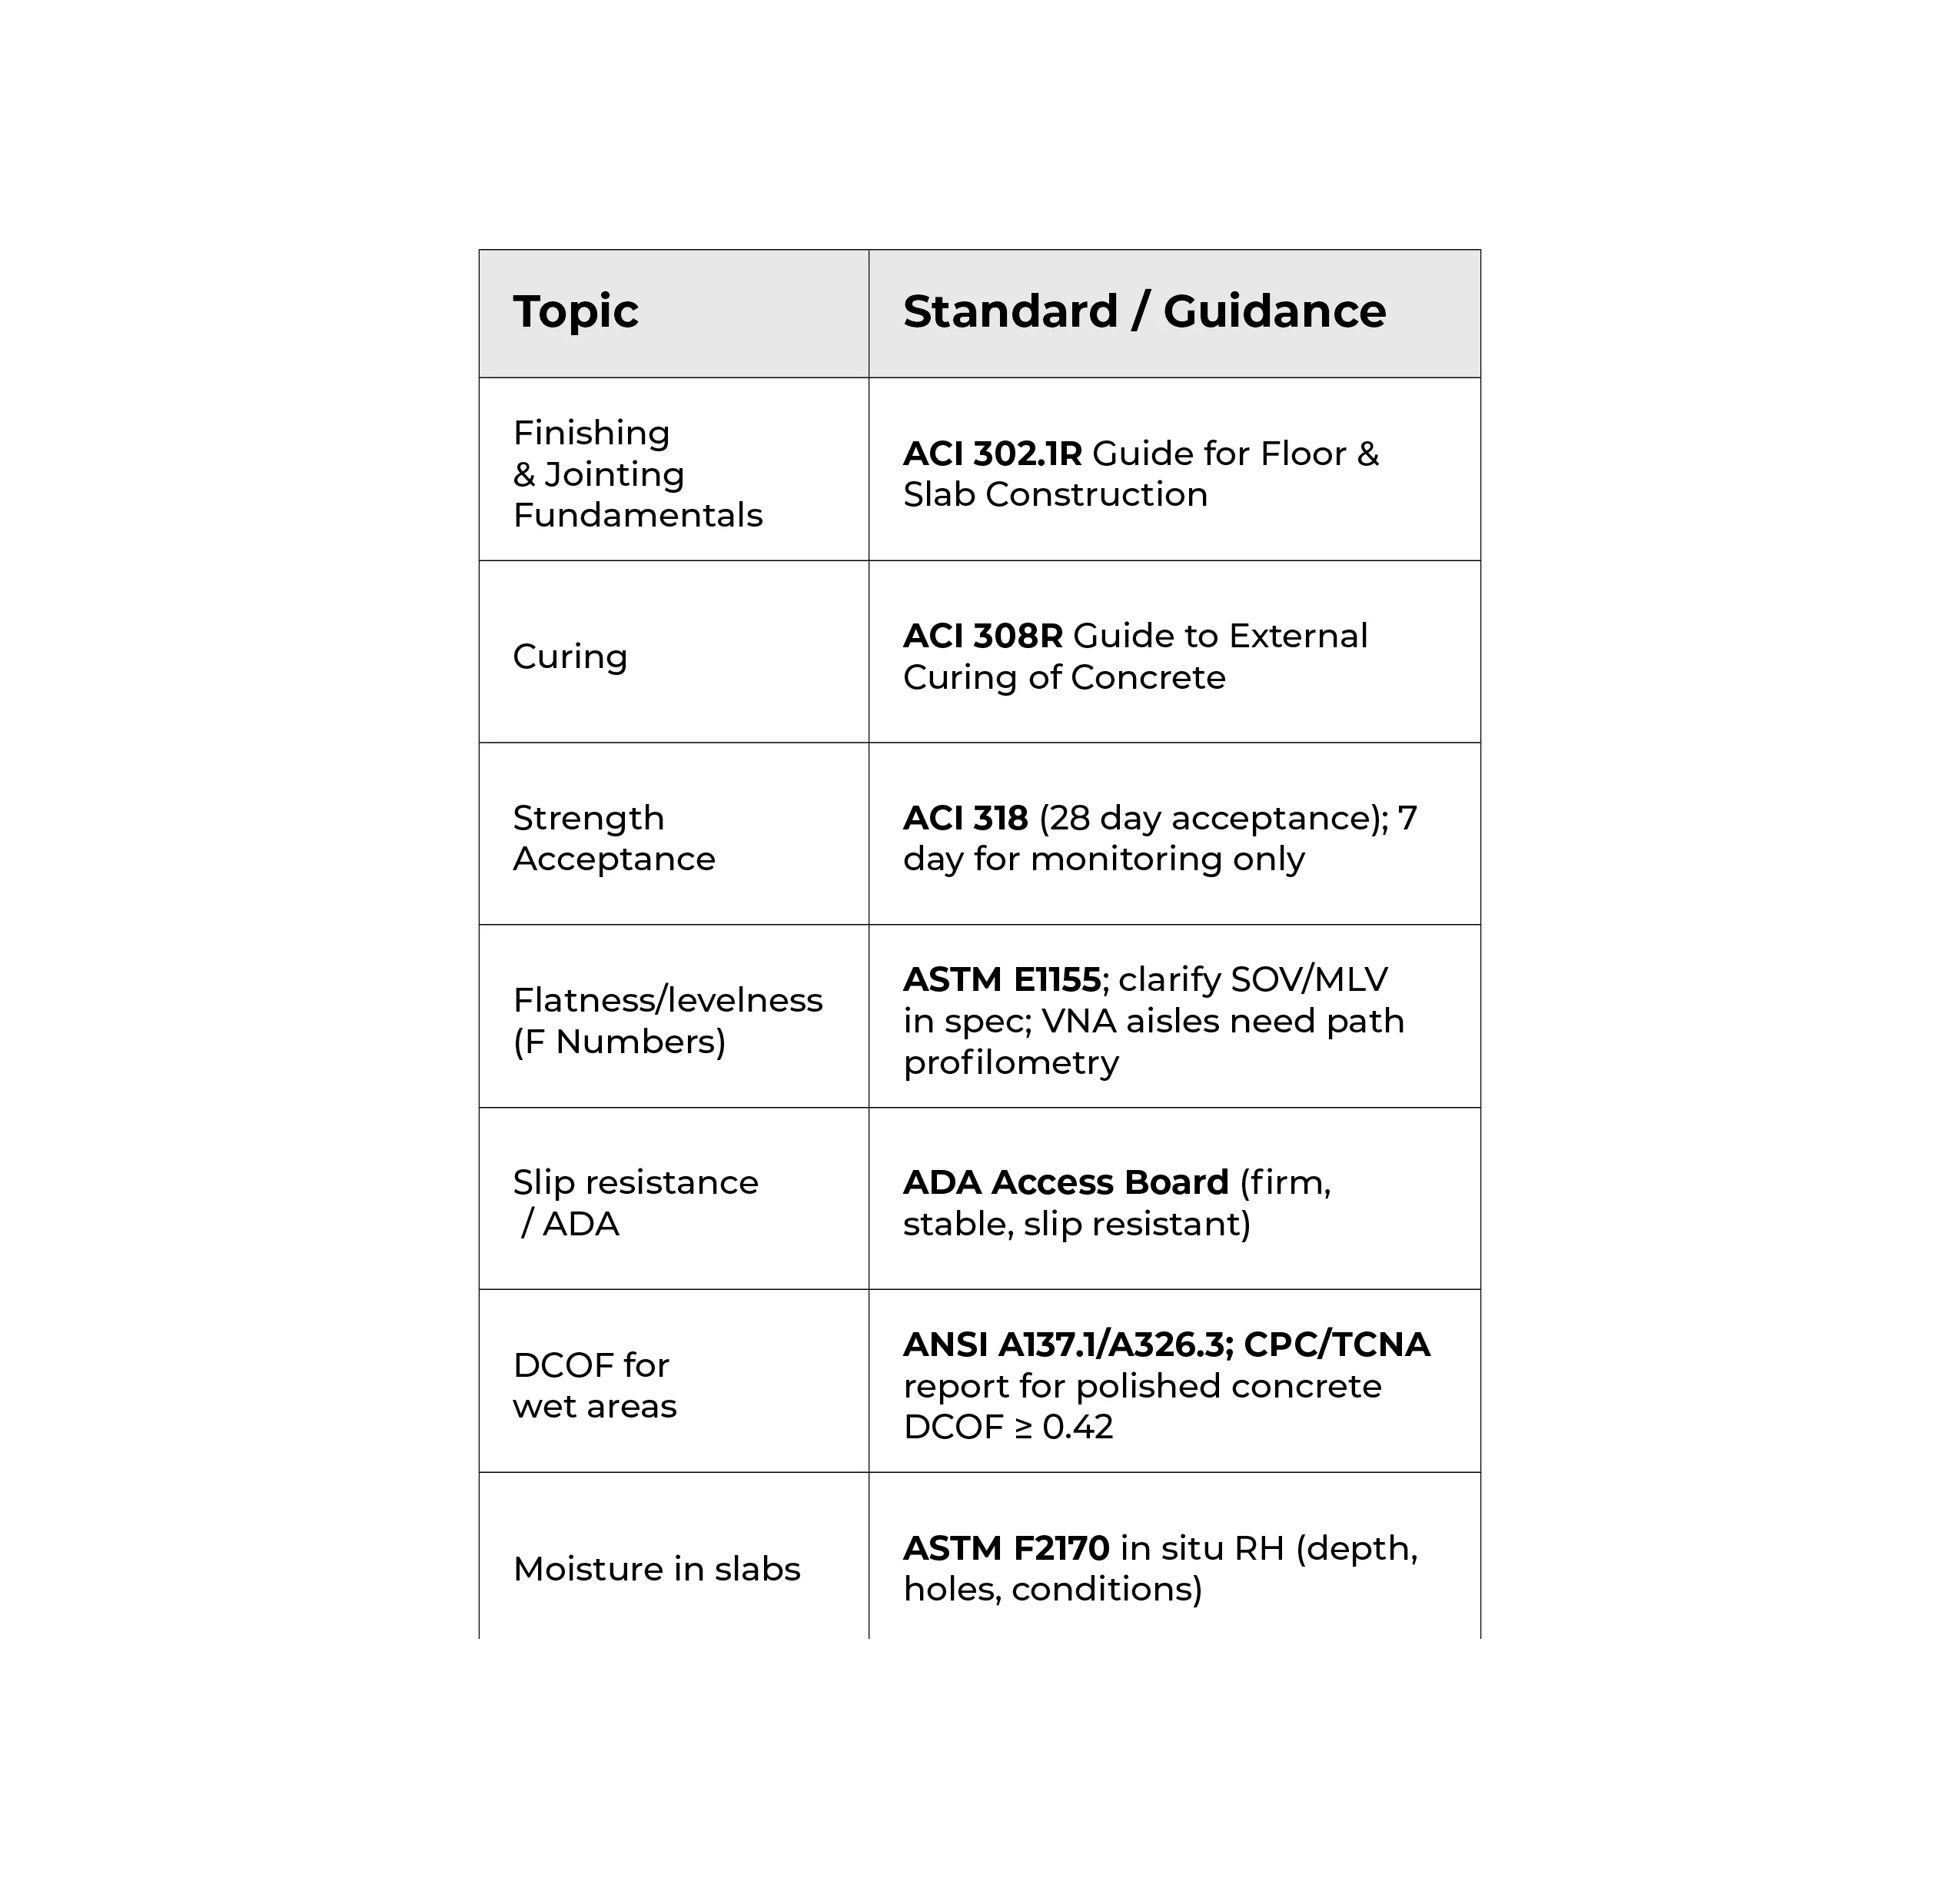
- ASTM E1155 lays out the measuring requirements (FF for flatness, FL for levelness) and includes statistical sampling for random traffic floors. If you’re working with fixed path VNA (very narrow aisle) aisles, you will need direct path profilometry, rather than an E1155 random sampling. Coordinate the Specified Overall Values (SOV) and Minimum Local Values (MLV) in your specifications. Remember, E1155 computes values, it does not define sectioning or pass/fail criteria.
- Design guides typically illustrate common FF/FL ranges by use. For example, office/retail, or defined traffic aisles, but you want to use the appropriate guide specific to your project.
5) Slip Resistance / ADA / DCOF
- The Americans with Disabilities Act (the ADA) requires construction to include accessible surfaces that are firm, stable, and slip resistant, although there is no single DCOF (Dynamic Coefficient of Friction) mandated. It is important to select textures and finishes that are appropriate to likely conditions and potential contaminants.
- Polished concrete tested by CPC/TCNA showed DCOF ≥ 0.42 across multiple gloss levels using ANSI A137.1 / A326.3 methods—document target DCOF by area and condition (dry/wet).
6) Moisture Testing Prior to Coatings/Resilients
- For in-situ RH (relative humidity) probes, refer to ASTM F2170, which calls for three holes for first 1,000 s.f. and 1 hole per additional 1,000 s.f.. Then test at 40% depth for one sided dry concrete, or 20% depth for two sided dry concrete, after 48 hours at normal service conditions. Record and report your readings, and compare them to coating manufacturer’s RH limits.
B. Finish By Finish Technical Detail
Consider utilizing the following “process blocks” when planning and executing your finishes. We’ve broken them out for you on each type of finish as follows:
Prep/Place → Finish Steps → Joints/Curing → QA/QC → Cure/Use timing → Durability & Maintenance → Typical Uses
1) Troweled Finish (Steel Trowel/Burnished)
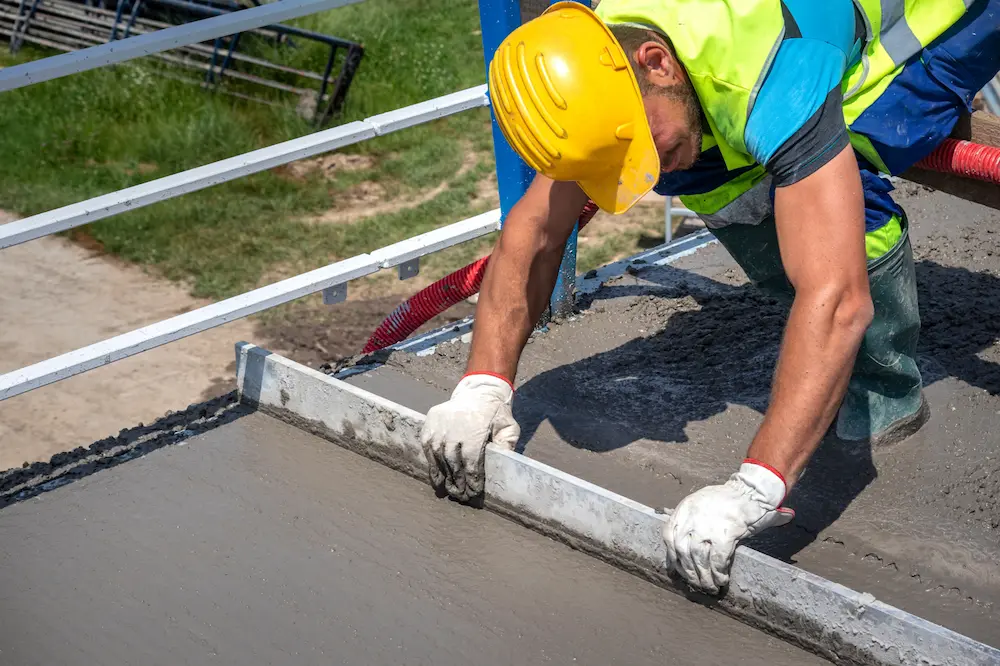
Process: Follow your strike off with a bull float. Allow any and all bleed water to evaporate fully. Densify the top pass with multiple steel trowel passes. Use power trowels for large bays. Uniform timing is vital to avoid dark/light burnish patching.
Joints/Curing: Layout joints per plans and perform early entry cuts when the raveling risk is low. Begin curing immediately: wet cure or compatible curing compound.
QA/QC: Monitor your finish window, avoid over troweling to reduce the chances for entrapped water and air that can lead to dusting, and check your FF/FL levels.
Cure/Use: Typically, your cure will be walkable on the next day, but will not sustain heavy rolling loads until after the full design strength and curing period have ended. Be sure to coordinate your cure times with any TI schedule. TI is an abbreviation for titanium dioxide – TiO2 – the substance often used as a photocatalyst in more sustainable concrete finishes and mixes.
Durability & Maintenance: You should achieve good abrasion resistance, if the concrete was cured and jointed correctly, with low wet traction. This means your facilities and operations managers should specify mats or surface treatments should this finish become wet.
Use Cases: Offices, retail, back-of-house dry areas. Be sure to set DCOF and safety expectations if this finish is exposed to wetness.
2) Float Finish (Mag/Wood Float)

Process: After your bull float, use a mag or wood float to open the paste and create a fine texture. This is often the intermediate step before steel troweling, or a final finish for traction.
Curing/QA: The same notes here as for the finish above. It’s important to watch your cure window, and check for texture uniformity across placements.
Performance: Float finishes generally provide higher traction than a plain steel troweled finish. Floats also retain modest amounts of soil over time, so they usually require a regular cleaning schedule to maintain their appearance and traction.
Use Cases: Exterior aprons, loading areas, or as a base for a broom finish
3) Broom Finish
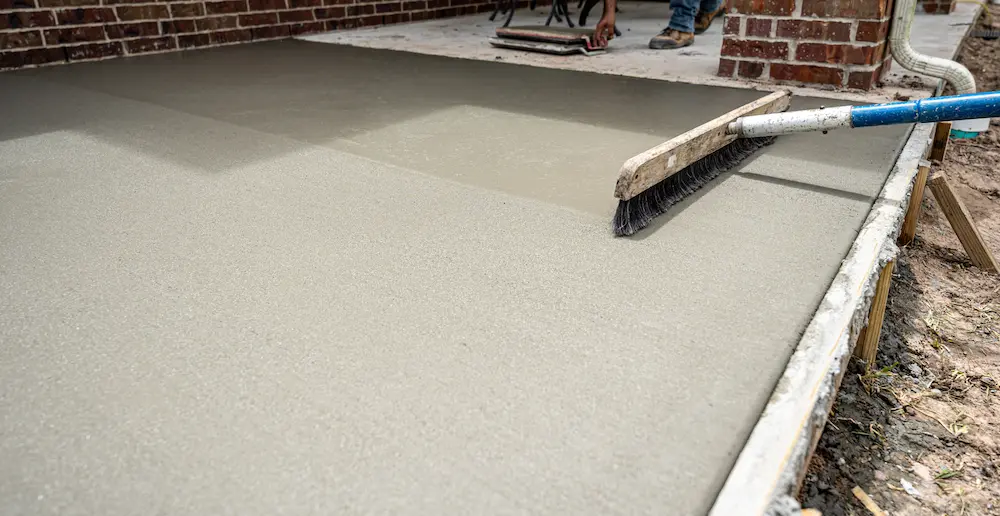
Process: While the surface is still “plastic,” draw a broom consistently – either in one direction or in a cross broom pattern, as specified in your plans – for ridged texture. You can control your ridge depth with the stiffness of your broom bristles and how you time consecutive passes.
Joints/Curing: Broom finishes generally go best when you joint early, then cure to lock in the paste and minimize scaling.
Safety/DCOF: Broom finishes are known for their excellent wet traction, which is why they are common for ADA routes and ramps when detailed properly.
Use Cases: Sidewalks, ramps, exterior paths, the walking surfaces of parking decks
4) Exposed Aggregate
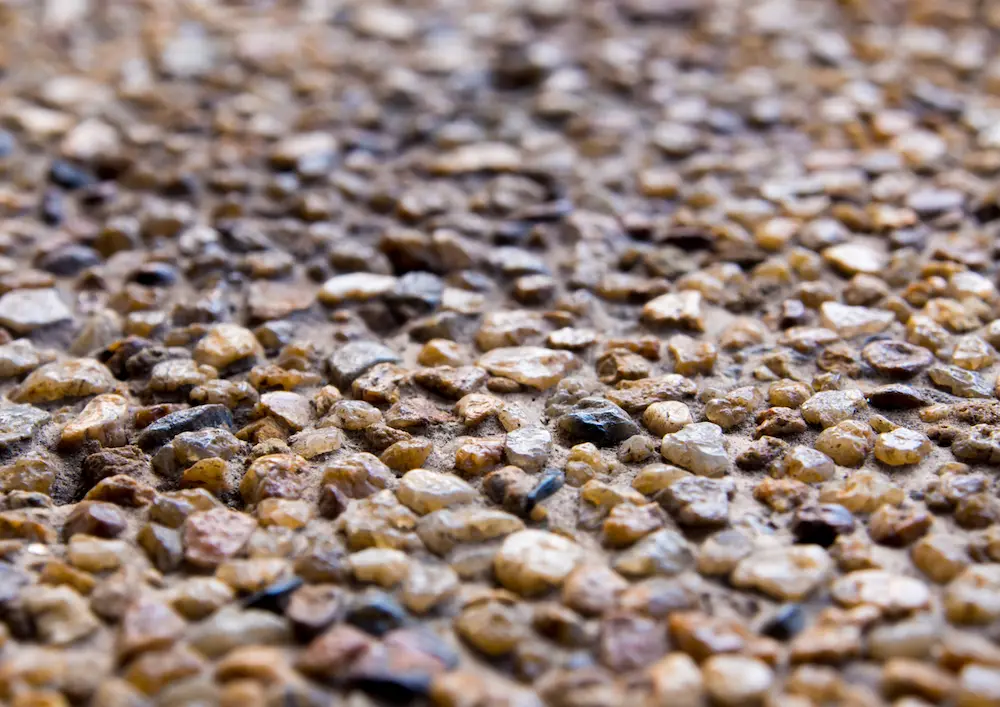
Process: Place your concrete, then seed or use integrally mixed decorative aggregate over it. Utilize surface retarders or a timed wash to provide uniform aggregate exposure. It’s important to protect this finish from early drying to lock the aggregate features in place.
Curing: To minimize aggregate feature loss and staining, sealants/sealers are often recommended.
Performance: Exposed aggregate finishes are generally high traction and durable in bad weather. However, they can present navigation challenges for wheeled carts and items with small casters.
Use Cases: Plazas, hospitality exteriors, pool decks
5) Stamped Concrete
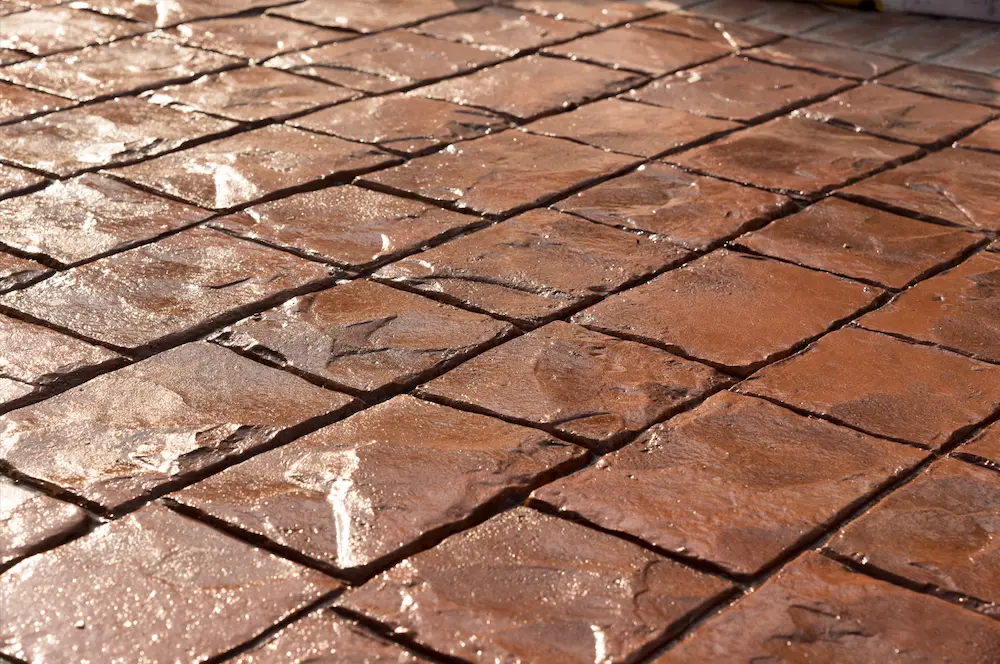
Process: Stamped concrete requires color hardeners and release agents that are applied via stamping mats during plastic stage, and a plan that details the joints to follow the stamped pattern’s logic.
Curing/Sealing: Whatever curing compound you use should be compatible with the ongoing need for periodic resealing to protect the color/pattern. When selecting additives, it is important to choose those with anti slip protections for wet zones.
Performance: While stamped concrete finishes are decorative, they still require joints and cracking control, as well as slip-resistance. That’s why it’s important to schedule regular reseal cycles that meet your traffic and UV conditions.
Use Cases: Retail streetscapes, restaurant patios, branded entries, mixed-use properties
6) Stenciled Concrete
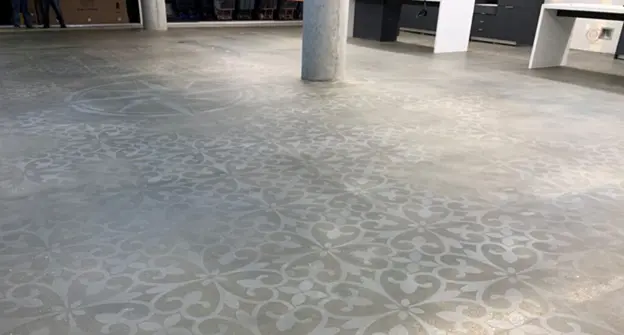
Process: The process and care schedule for stenciled concrete is similar to stamping, but generally stenciling is best used in areas without high foot traffic. Process-wise, once you’ve hit an acceptable level of cure, place and set your stencils, add your color, hardener, and/or texture. Then remove the stencils, allow the concrete to complete its cure, and seal accordingly.
Performance: Stenciling is a more cost effective method than stamping to add patterns in areas that have light to moderate foot traffic. However, it is not often used with a strong texture, and it does require monitoring for colorfastness, and a regular schedule for resealing to maintain the pattern.
7) Polished Concrete
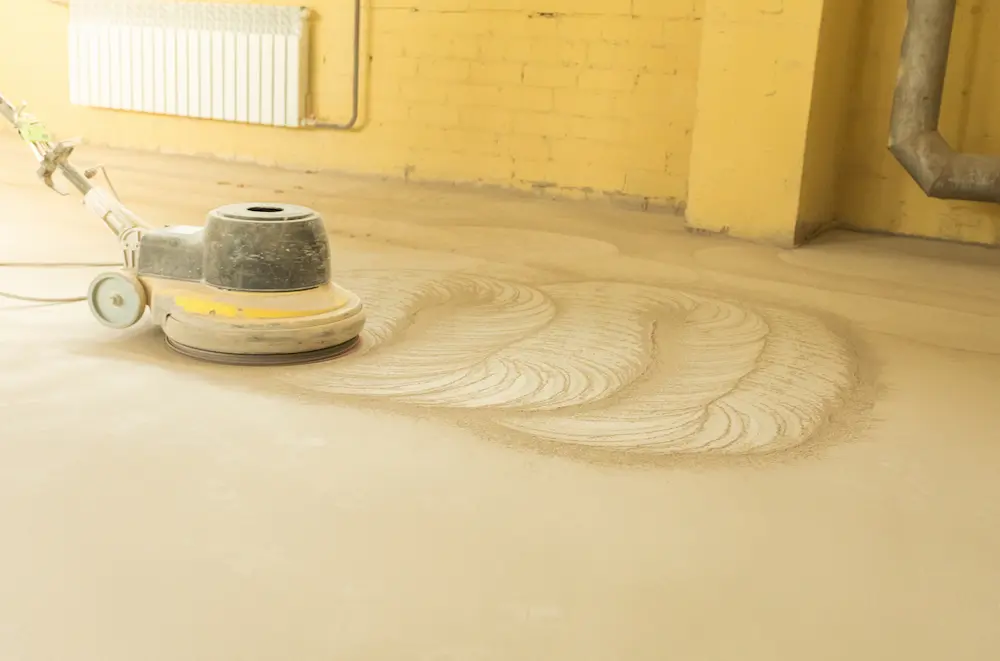
Process: This finish provides a high-gloss, slick look to your concrete. To achieve it requires 6-8 grinding and polishing steps at minimum. Grinding is most often an aggressive metal bond grind with a highly abrasive diamond-tipped head to smooth out rough spots and level the surface, followed by finer grinding in the transition phase to smooth the surface. A resin-bond grind following the initial grind will not usually do enough to fully polish the surface, so you may need to follow it with a ceramic or copper bond matrix polish, to tighten the pores in preparation for applying a densifier to fill in pores and creating a harder, wear-resistant finish. Refer to the specified CPC (Concrete Polishing Council/ASCC) class, aggregate exposure, and sheen when finishing and verify by DOI (Distinctness of Image), gloss, or haze metrics.
Slip Resistance: CPC and TCNA (Tile Council of North America) testing showed a DCOF ≥ 0.42 across finishes, which is in keeping with ANSI’s A326.3 requirements for interior, wet areas like bathrooms, kitchens, lobbies, and large retail stores like supermarkets. Due to its high gloss, it is crucial to document all target metrics and cleaning regimen schedules because gloss alone cannot predict slip; contaminants and maintenance have a huge impact on it.
Energy/ESG: The highly reflective surface of polished concrete can reduce lighting energy needs, and concrete’s thermal mass can help moderate indoor temperatures, which support energy performance and LEED strategies, when included as part of a whole building design.
Curing/Timing: Due to the aggressive nature of the initial grind stages, you need to allow for 28 days of cure, on average before grinding, depending on the project needs. If you need to polish early to keep to schedule, a best practice is to utilize contractor submittals to document risks and mitigations.
Maintenance: After its initial labor-intensive finish, polished concrete can be one of the easiest to maintain. Often a dust mop and periodic autoscrubbing can handle cleaning, as long as you avoid film forming sealers that can mask or impact your refinement metrics. You will also need to schedule periodic re polishes for higher traffic lanes.
Use Cases: Warehouses, big box retailers, showrooms, offices, schools
8) Epoxy Coatings: 100% Solids, Waterborne Systems, High Chemical/Novolac
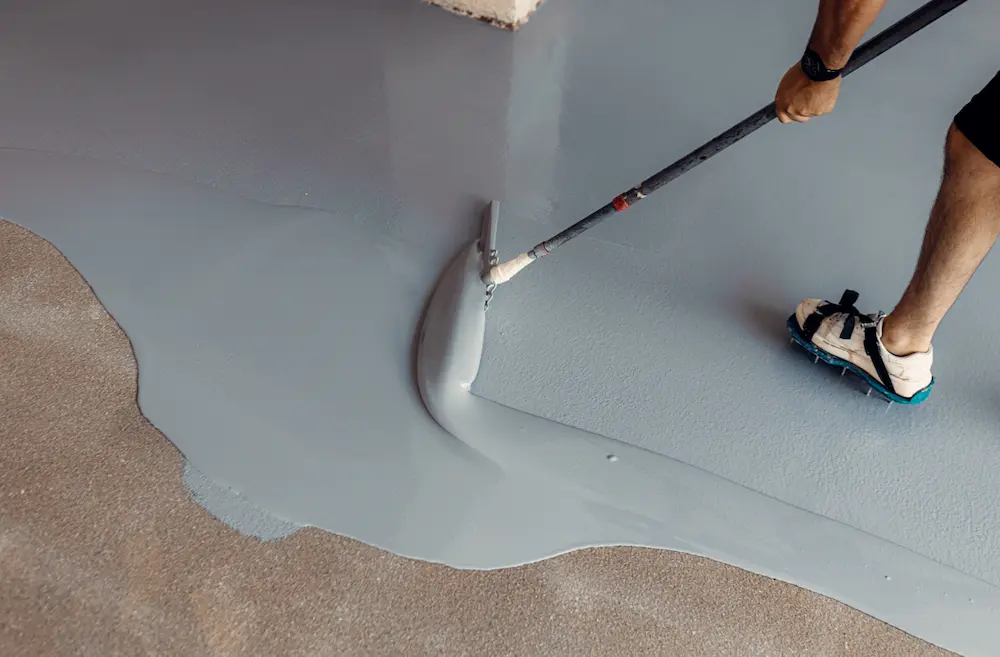
Epoxy finishes and coatings vary greatly depending on the use case. Durability, resistance to chemicals, and the environment during application can all play a role. Heavy duty protection often requires 100% solid epoxy, less high-traffic/high-stress use cases may be able to make use of waterborne systems, while areas that will endure extreme chemical exposure, like labs, chemical processing facilities, or battery recharging rooms will likely need Novolac.
Substrate Preparation: Decide on the necessary CSP (Concrete Surface Profile) and proceed with grinding or shot blasting to achieve the required roughness level. Verify the relative humidity (RH) level needs via both ASTM F2170 and the manufacturer requirements before treating, and remove any potentially incompatible curing compounds.
Build & Film Thickness: Most common epoxy systems provide a thin-mil or thin-film coating of 10–30 mils. Broadcast/quartz (distributed aggregate) and mortar systems (filler sand or aggregate) will be thicker by necessity. Your build and thickness requirements will depend on traffic needs, the level of chemicals to which the finish may be exposed, and thermal cycling.
Chemistry: Bis A, Bis F, and Novolac systems vary in their levels of chemical and temperature resistance. Determining your choice of hardener: polyamide, amine, cycloaliphatic, or phenalkamine, can tune your cure speed, blush, and chemical resistance.
Cure & Recoat Windows: Many 100% solids systems are tack-free at around 3-8 hours at a steady temperature of 70°F. In general, you can recoat anywhere from 3 hours to 14 days after your initial coat. Light traffic areas can be ready in as little as 24 hours, while areas requiring full chemical resistance will take 3-7 days, depending on the ambient temperature during cure. It is important to verify these times via your product’s data sheet.
Industrial Duty: Epoxy finishes are desirable in areas that need high chemical and abrasion resistance. Novolac is the most-often suggested epoxy for areas where strong acids and/or solvents are used, in secondary containment areas and process trenches, for example.
Use Cases: Manufacturing, pharma/healthcare, food & beverage manufacture, commercial kitchens, laboratories
C. Curing, Moisture, and Timing: What You Need to Schedule
Recommended Curing & Use Milestones in Typical Ranges.
(Always verify your specifications and product data.)
- Concrete curing: It is important to maintain moisture for your wet cure or curing compound per ACI 308R. Many mixes say they need 7 days. The cure period could be more for a moist cure, so check specifications because early drying elevates your risk for dusting and scaling.
- Sawcut: You can often cut somewhere between 4 and 12 hours after placement depending on conditions with a depth at 1/4 slab or more (≥ 1 in. minimum). You’ll want to coordinate any early entry saw cuts to minimize raveling.
- Moisture testing: Conduct ASTM F2170 at your regular service conditions. While you can insert a probe as early as 24 hours post-finish, the industry standard is to allow 48 hours of cure/conditioning period before testing. The necessary probe hole depth is 40% for one-sided, or 20% for two-sided slabs, with 3 holes per the first 1,000 s.f. and1 hole per each 1,000 s.f. thereafter. Be sure to compare your desired results to the manufacturer’s RH limits before installing epoxies.
- Epoxy coating service: Your finish can usually sustain light foot traffic in under 24 hours at an ambient conditioning temperature of 70°F. Surfaces requiring heavy or chemical exposure can be used once the full cure is reached, usually in 3-7 days. When recoating, your window could be a few hours to several days, depending on the finishes’ chemistry and the ambient temperature.
- Polish start: Industry standards prefer at least a 28-day cure period before a full grind or polish, unless early polish plan is approved.
D. Durability, Performance & Safety: What the Data Says
- Your finish choice impacts abrasion resistance and maintenance schedules: Inadequate curing/finishing can lead to dusting and early wear. Allowing enough time for proper curing elevates surface hardness and creates a longer-lasting finish.
- Polished concrete can reduce energy use via reflectivity and has been shown to moderate HVAC loads via thermal mass. However, these benefits are only when your concrete finishes are integrated with the lighting and HVAC designs and maintenance schedules.
- Slip resistance is context sensitive and can depend on a wide number of variables like contaminants, footwear, slope, and maintenance, among others. The ADA stops short of prescribing a single COF, so it’s a good idea to document surface conditions and cleaning schedules in O&M manuals.
- CPC/TCNA DCOF testing found polished concrete sections exceeded 0.42 even at high gloss, making them safe for high-traffic, wet areas. However, gloss ≠ safety. Soiling, cleaning routines, and spill management can all impact slip.
- Epoxy systems can achieve high chemical and abrasion resistance. Novolac resins can extend acid resistance, but you must confirm compatibility and the specific recoat and cure windows to avoid amine blush or intercoat adhesion issues.
E. Market & Usage Snapshot (context for owner conversations)
- The decorative concrete market, which includes polished, stamped and overlay finishes, is estimated at just under $19.5B in 2025, with an approximate 5-6% CAGR future-cast into 2030–2037 across analyses. These numbers reflect continuing and sustained demand in nonresidential and commercial upgrades and low maintenance finish needs.
F. Submittal Language & QA/QC Checklists
Here are some quick submittal language specifications and QA/QC checklists that you might be able to make use of for your concrete finishing work.
1) General Slab & Finish Submittals
- Mix design with SCMs, water cement ratio, admixtures; target strengths and shrinkage data. (Acceptance at 28 days per ACI 318 unless noted.)
- Finishing plan: manpower, equipment (screeds, pans, power trowels), placement map, FF/FL targets and test plan per ASTM E1155 (SOV & MLV defined in spec).
- Joint layout (spacing, depth, timing, filler type; early entry saw plan)
- Curing plan per ACI 308R (method, duration, compatibility with coatings)
- Moisture testing plan: ASTM F2170 method, hole depths/locations, service conditions confirmation, manufacturer RH thresholds
2) Finish Specific QA
- Polished Concrete: Specify CPC Aggregate Class (A–D) and Appearance/Gloss Level (1–4); require DOI/gloss/haze verification before any topical guards. Include DCOF target by area/use
- Epoxy Coatings: Substrate CSP, RH % (F2170), primer/system thickness, recoat window, cure schedule, chemical resistance tables (if labs/process)
- Exterior textured finishes (broom/exposed/stamped): State slip resistance expectations and sealer maintenance intervals
G. Quick Reference Tables
Table 1 – Processes, Timing, and Curing (selected highlights)
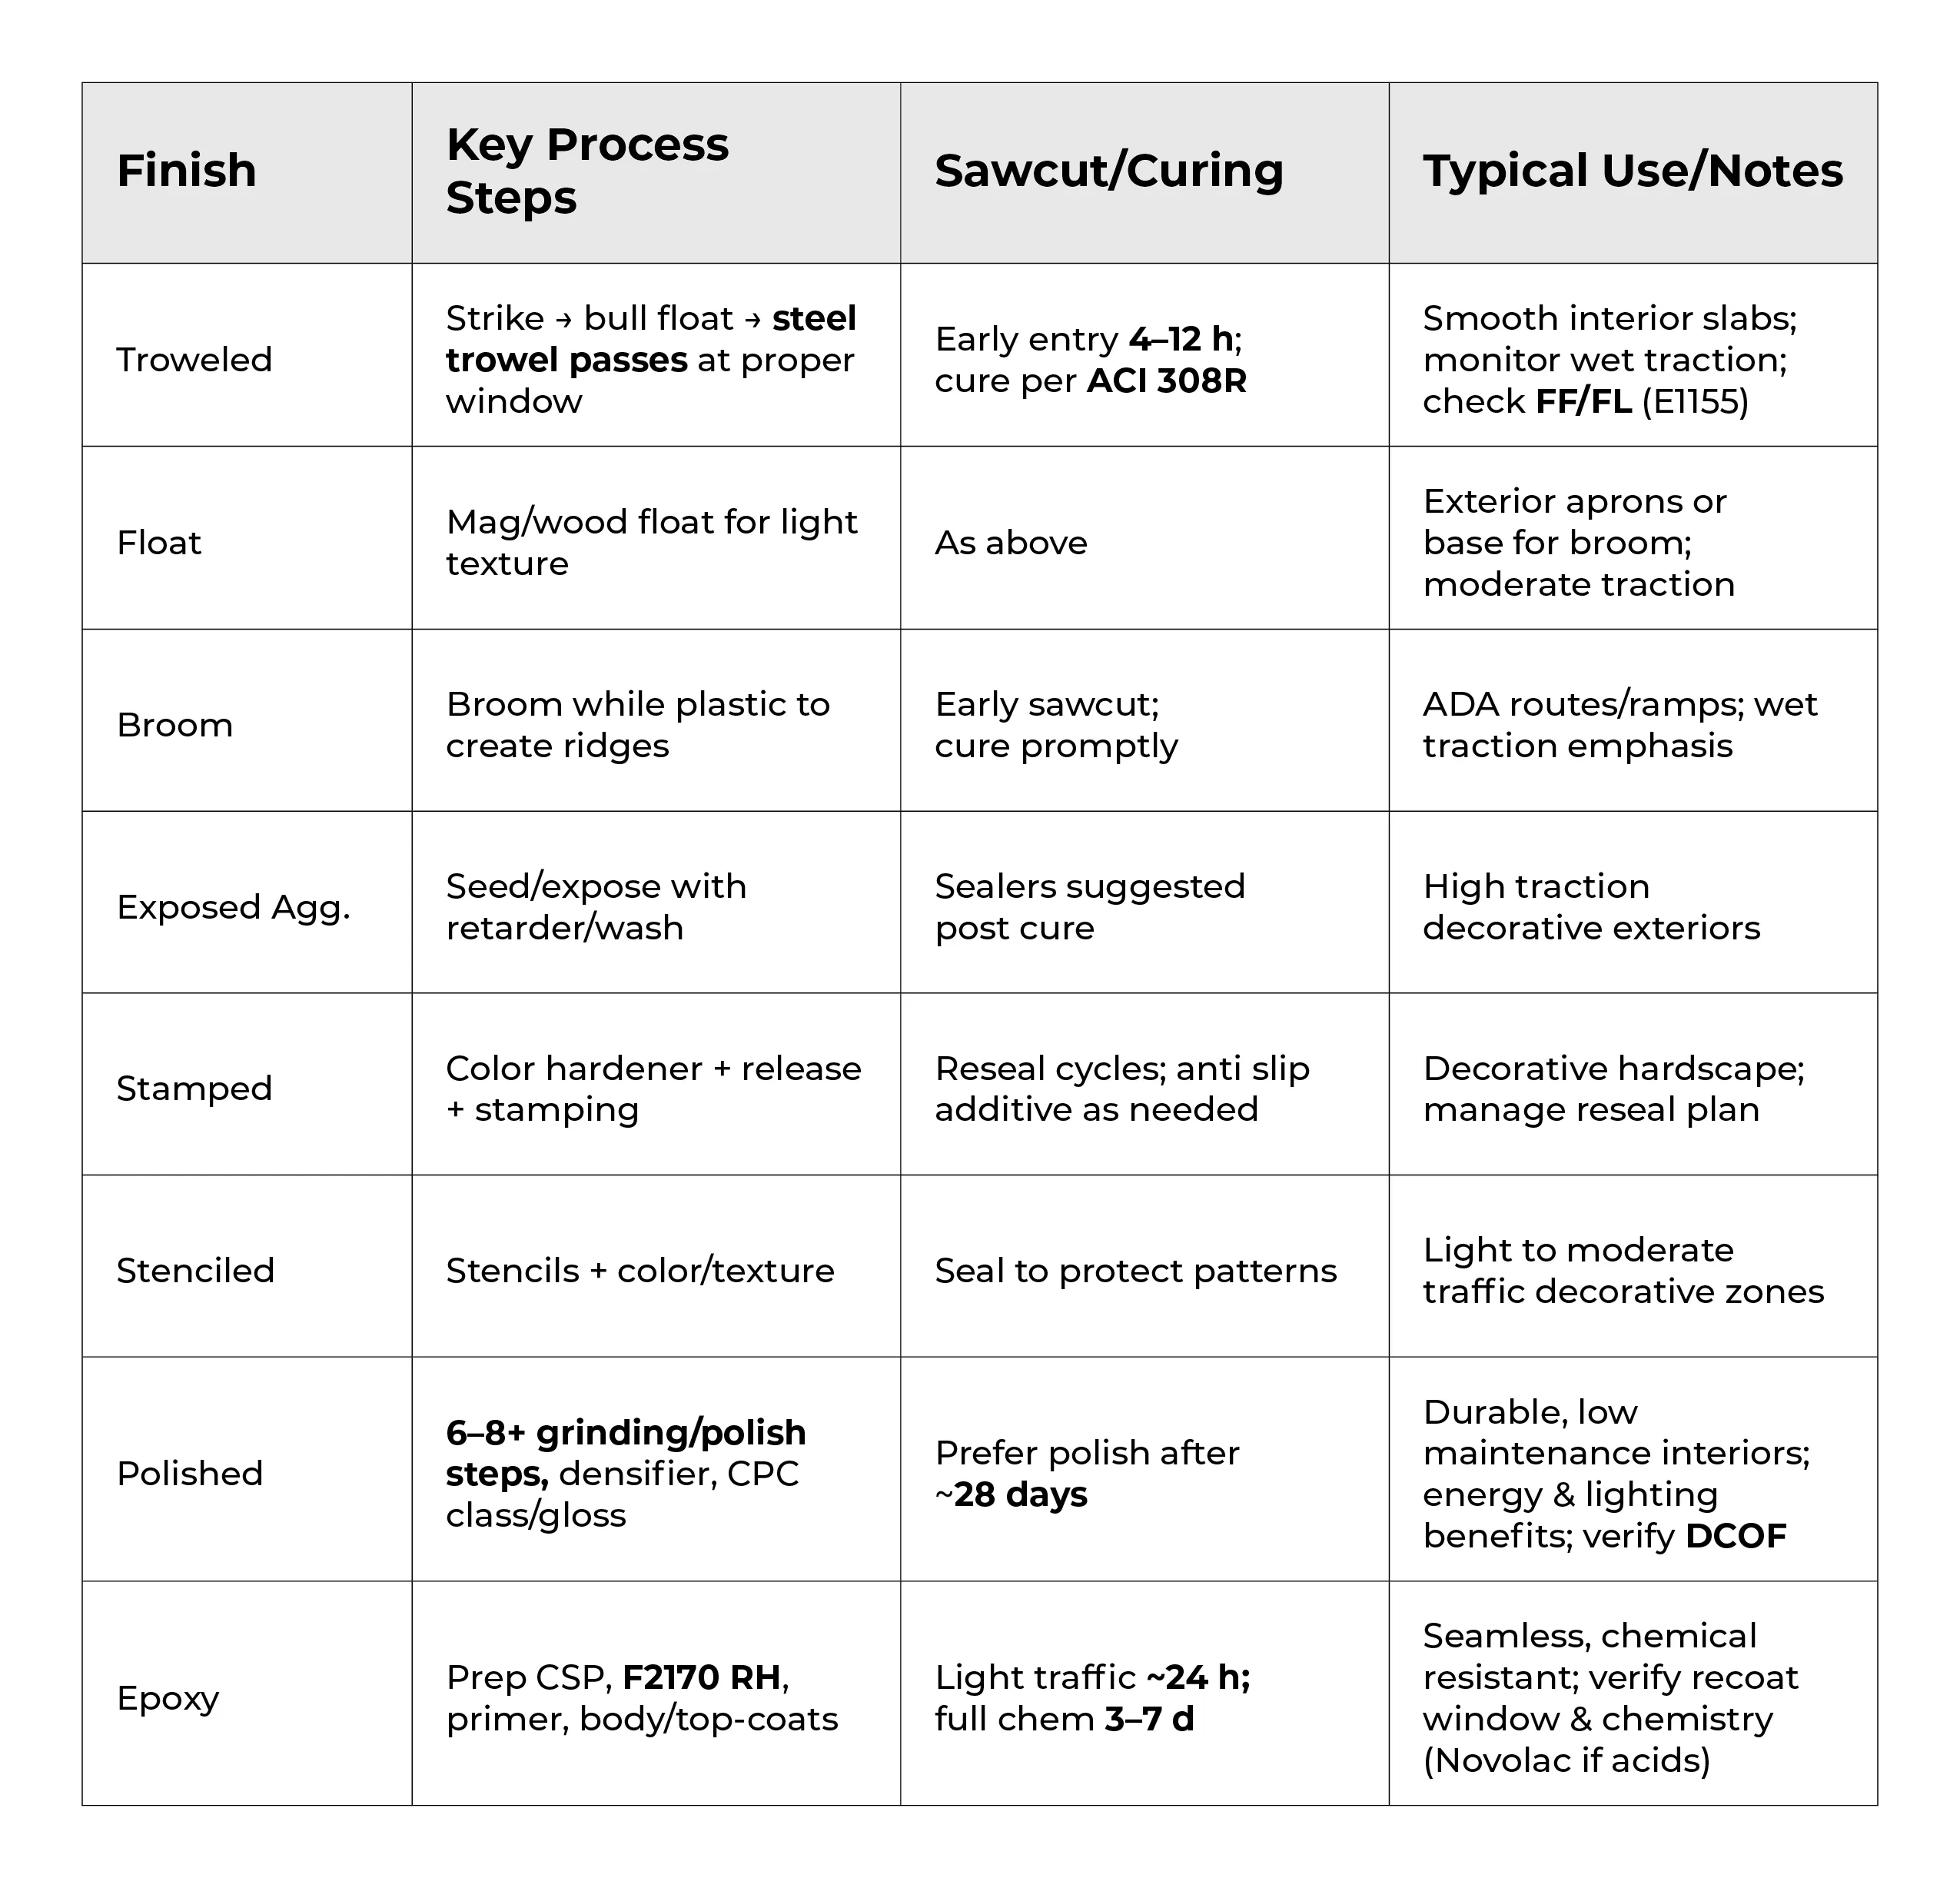
Table 2 – Standards & Tests to Reference
H. Decision Matrix: Matching Finish to Facility Demands
- Heavy forklift traffic / low maintenance → Polished concrete (spec CPC class/level; protect from oils with penetrants as needed; document cleaning program) and/or epoxy mortar/quartz in impact/chemical zones
- Food, healthcare, labs → Epoxy/Novolac systems with coves, slope-to-drain, and documented RH compliance (F2170)
- Exterior pedestrian safety → Broom or exposed aggregate (ADA emphasis) with UV-stable sealer plan
- Branding/streetscape → Stamped/stenciled, with reseal budget and anti-slip additives where wet
I. Common Pitfalls & How to Avoid Them
1. Finishing too early (over bleed water) → weak, dusty surface. Train crews to wait for the right window; mockups help
2. Late saw cuts → random cracking. Staff early-entry saw crew or adjust pour sizes/logistics
3. Incompatible curing when coatings planned → remove film-forming compounds or select compatible systems; coordinate early with coating sub
4. Skipping RH testing → coating delamination/OSD. Always test per ASTM F2170 and document
5. Mis-specifying FF/FL → claims and grinding. Write SOV/MLV and paths (for VNA), not just “per E1155”
6. Assuming gloss = safe → specify DCOF targets, cleaning, and mats in wet zones
7. Conduct comprehensive concrete scanning & imaging before cutting, coring or drilling into finished and cured concrete slabs. Finishes can be repaired in a variety of ways once you've pierced the surface, but your repair costs will skyrocket if your saw cut or anchor core strikes a post tension cable, conduit, or concrete reinforcement. In the case of outdoor concrete finishes and slabs, you may also strike underground utilities that could include gas lines, water mains, telecommunication lines, electrical transmission lines, and more, which could further hinder work progress and lead to cost overruns. Hiring a private concrete scanning and utility locating company like GPRS to visualize what’s inside and under your finished concrete can save labor hours, dollars, and can help keep your contractors, subs, and team members safe.
GPRS Visualizes The Built World® for customers throughout the U.S. What can we help you visualize?


.svg)